Download our product information sheets: Rope Cutters | Flexible Engine Mounts | Damper Drive Plates | Flexible Shaft Couplings | Clamp Half Couplings, Adaptors & Bobbins
UK Office Opening Hours: Monday - Friday: 8:00am - 5:00pm | Saturday & Sunday: Closed
Published on December 24, 2025
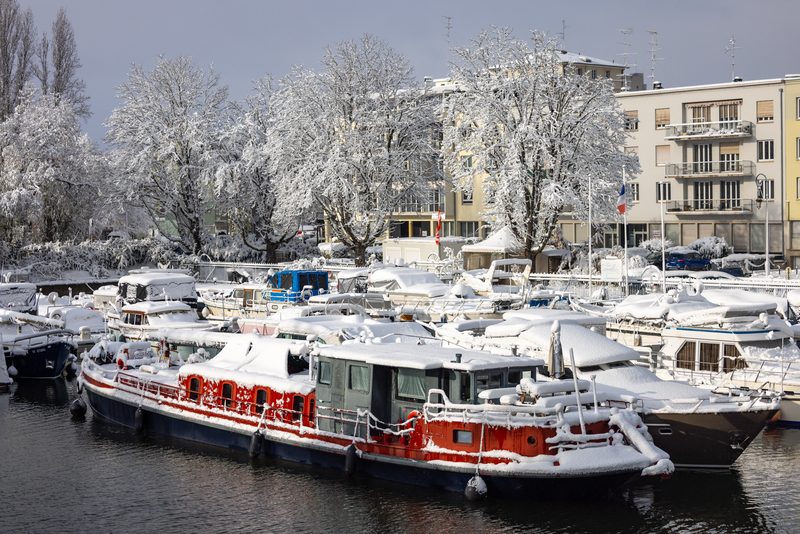
Summer’s behind us, the days are shorter, and the water’s getting colder. For boat owners across the UK, that means one thing: it’s time to think about winterisation.
While it’s tempting to simply cover your boat and hope for the best, those months of cold, damp conditions and inactivity can quietly wreak havoc on everything from your engine to your drivetrain.
Freezing temperatures can crack engine blocks, moisture breeds corrosion in electrical systems, and even minor vibration stresses intensify when components sit idle for weeks on end.
However, with a proper winter prep routine, you can protect your investment and means you’ll be back on the water faster when spring arrives.
It’s tempting to think a boat can simply be left alone for a few months, but marine engines and drivetrains aren’t designed to sit dormant in cold, damp conditions.
Freezing temperatures can crack engine blocks, burst pipes, and corrode metal surfaces. Even in milder UK winters, condensation and moisture ingress wreak havoc on electrical systems and fuel lines.
Beyond the obvious risks, winter boat maintenance is also about protecting the mechanical systems that keep your vessel moving. Misalignment can develop during haul-out, vibration stresses accumulate in engine mounts, and corrosion creeps into couplings and shafts. Addressing these issues during your winter prep means you’re not discovering them halfway through next season.
Before anything else, give your boat a proper once-over. Winter prep starts with knowing exactly what condition your vessel is in, and there’s no better time to spot problems than before they spend months getting worse.
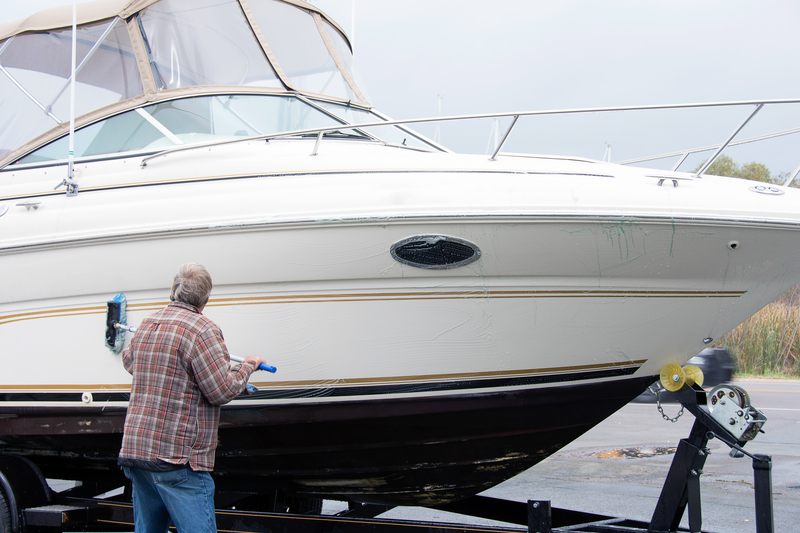
Start with the outside. Wash the hull, decks, propellers, and all metal fittings using a marine-safe soap. If you’re lifting your boat out for winter storage, pressure-wash below the waterline straight away, before any fouling has a chance to harden and become a nightmare to shift come spring.
For those of you with saltwater boats, desalination is necessary. Salt accelerates corrosion on every metal surface it touches. Rinse everything thoroughly with fresh water, paying special attention to through-hull fittings, stern gear, and anything stainless steel.
Once clean, apply a good marine wax or polish to the gelcoat. Think of it as a protective layer against winter weather. It’ll make spring cleaning easier, too.
Now head below deck. Remove any food, valuables, and soft furnishings. Cushions, bedding, and fabric items should be removed entirely from the boat. Store them somewhere climate-controlled if you can; otherwise, they’ll return in spring smelling decidedly less than fresh.
Moisture is your enemy during winter lay-up. Place moisture absorbers or a small dehumidifier below deck, and prop open locker doors, hatches, and cupboards to keep air circulating. Stagnant air invites mildew, and once it takes hold, you’ll be scrubbing for days.
While you’re cleaning, keep your eyes open for:
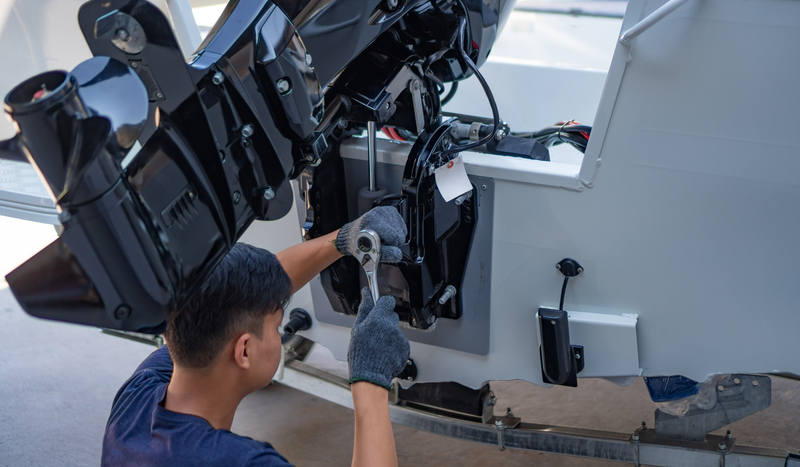
If you spot anything dodgy with your anti-vibration mountings, note it down. Better to plan a replacement now than discover a failed mount or couplings when you’re commissioning in April.

Your engine is the heart of your boat, and it deserves proper care before the cold sets in. Marine engine winterisation isn’t just about preventing frost damage. It’s about stopping corrosion, protecting internal components, and making sure everything fires up smoothly next season.
Old fuel left sitting over winter breaks down, forming varnish and gum that can clog injectors and carburettors. Start by filling your fuel tank to around 95%. This minimises the air space where condensation can form, but leaves just enough room for thermal expansion.
Add a quality marine fuel stabiliser according to the manufacturer’s instructions, then run the engine for 10 to 15 minutes.
This circulates the treated fuel through the entire system, including the carburettor or injectors. Once done, close or seal the fuel valves to keep vapours where they belong.
Think of an oil change as insurance. Old oil contains combustion by-products, moisture, and acids that will corrode internal engine parts if left sitting all winter.
Warm up the engine first. Warm oil flows more easily and carries away more contaminants. Then drain the old oil completely, replace the oil filter (and fuel filter if applicable), and refill with fresh oil or winter-grade oil as specified by your engine manufacturer.
Dispose of the old oil responsibly. Most marinas have waste oil facilities.
Salt, silt, and general muck accumulate in your engine’s cooling passages over the season. Flush them with fresh water first to clear out debris, then drain the system completely.
Now comes the antifreeze. Use non-toxic marine antifreeze (not automotive antifreeze, which is toxic and not suitable for marine use).
Pump it through the raw-water cooling system until it runs out the exhaust. You’ll know it’s done when the telltale stream turns pink.
Fogging oil is brilliant stuff. It coats the inside of your cylinders with a protective film that prevents corrosion during storage.
Remove the spark plugs, spray fogging oil into each cylinder following the directions on the tin, then turn the engine over briefly by hand (or with the starter) to distribute the oil.
Don’t forget to lubricate all grease fittings, throttle cables, and linkages while you’re at it.
Finally, wipe down all exterior engine surfaces with a corrosion inhibitor. A little effort now saves a lot of elbow grease later.
Electrical gremlins are maddening at the best of times. Cold, damp winter conditions make them worse. A bit of prevention goes a long way.
Marine batteries don’t like being left discharged in the cold. Fully charge your battery before removing it from the boat. Clean the terminals with a wire brush, then apply a thin coat of dielectric grease to prevent corrosion.
Walk through your boat’s electrical system with a critical eye. Check wiring for signs of corrosion, particularly in bilge areas where moisture collects. Tighten any loose connections.
If you’ve got expensive electronics like chart plotters, VHF radios, or fishfinders, consider removing them and storing them indoors. Electronics don’t appreciate damp, and neither do the connections behind them.
Disconnect shore power safely before you leave. If you’re keeping any systems running over winter (like dehumidifiers or bilge pump monitors), make sure they’re on a properly protected circuit.
Water expands when it freezes. That’s basic physics, but it’s also the reason why frozen pipes burst and through-hulls crack. Draining your boat’s water systems completely is essential.
Start with the obvious: empty your freshwater tanks, holding tanks, and grey-water tanks. Then tackle the hot-water heater, bilges, and any other place water might lurk.
Remove drain plugs wherever you find them and open seacocks to allow natural drainage. If your boat’s stored at an angle, gravity will do most of the work for you.
Before winter sets in properly, give your water tanks a clean. Use a marine-approved disinfectant to flush them out, then rinse thoroughly with fresh water. Leave the hatches or inspection ports open so everything can dry out completely.
Even after draining, there’s usually some water trapped in low spots and pipe bends. That’s where non-toxic RV or marine antifreeze comes in. Pump it through all the freshwater pipes, taps, and heads until you see pink liquid coming out the other end.
Label each valve clearly with “antifreeze added” so you don’t forget to flush the system before using it next spring. Trust me, antifreeze-flavoured tea isn’t pleasant.
Squeeze your hoses. If they feel brittle or show any cracks, note them down for replacement. Check bronze seacocks for dezincification (that chalky pink corrosion that weakens the metal). If you spot any, the seacock needs replacing.
Grease seacocks according to the manufacturer’s instructions, or replace them if they’re stiff or corroded.
Winter storage is prime time for rust, seized fittings, and corroded metal. A bit of preventative maintenance now saves hours of cursing later.
Work your way around the boat with a grease gun and some marine-grade lubricant. Pay attention to:
Everything that moves should get a squirt of something appropriate. For winches, check the manufacturer’s recommendations, as some need specific lubricants.
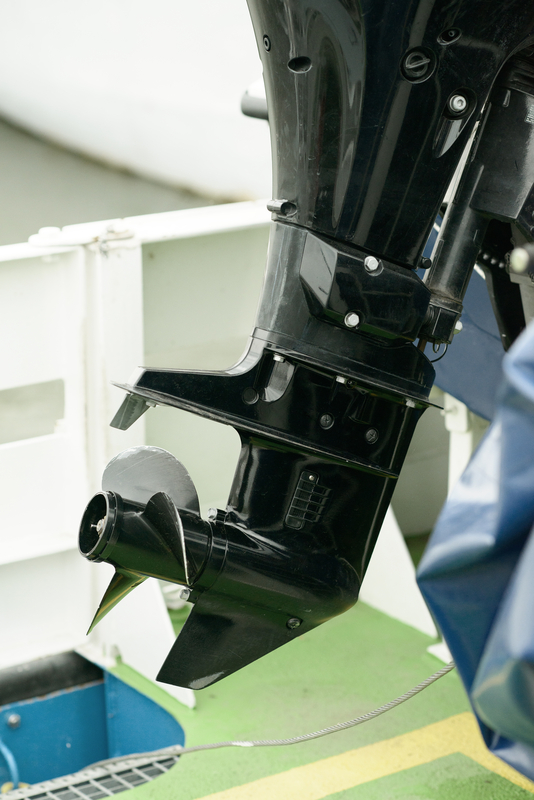
Spray a good corrosion inhibitor on exposed metal surfaces and electrical contacts. Don’t forget the propeller shaft. Give it a coat of waterproof grease and take a moment to remove any fishing line, plastic bags, or other debris that might have wound itself around the shaft over the season.
Stagnant air encourages condensation and mildew. Raise sole boards and prop open locker lids. Leave cupboards slightly ajar. Place moisture absorbers in each cabin, particularly in enclosed spaces like hanging lockers and under-berth storage.
Good airflow keeps things dry, and dry means minimal corrosion and mould.
Where and how you store your boat over winter makes a massive difference to its condition come spring. Whether you’re keeping her afloat or lifting her out, there are specific steps to follow.
Keeping your boat in the water over winter? You’ll need to check on her regularly. Double up your mooring lines and fit chafe protection anywhere they might rub. Add extra fenders, and adjust them after winter storms when water levels may change.
Check your bilge pumps and automatic float switches monthly. A blocked or frozen bilge pump can mean disaster if you get heavy rain or snowmelt. Make sure the batteries have enough charge to keep the pumps running, and clear any debris from the bilge.
If you’re lifting out, make sure your boat’s supported evenly on a proper cradle or trailer. Uneven weight distribution can stress the hull over time. Keep scuppers (deck drains) clear so rainwater can escape.
Pressure-wash the hull immediately after lift-out while the fouling’s still wet. Once it dries and hardens, you’ll need a chisel and a lot of patience.
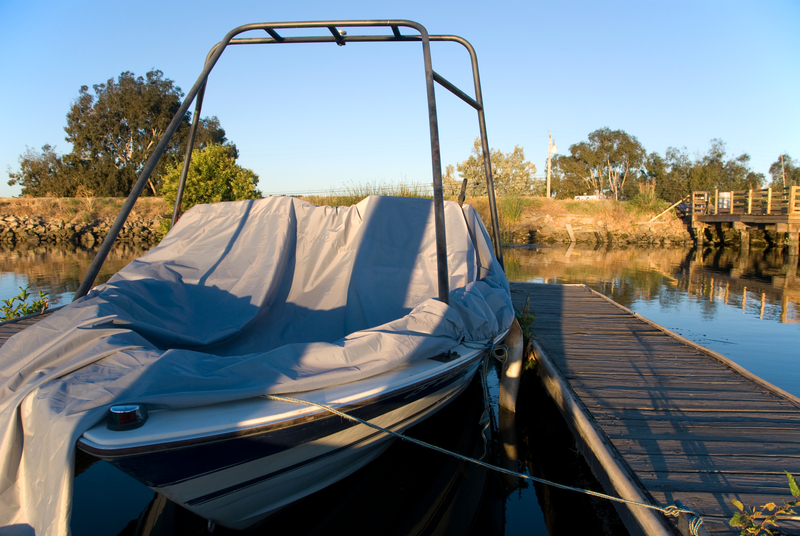
Invest in a good breathable boat cover. Plastic sheeting or airtight tarps trap moisture underneath, creating a perfect environment for mildew. Proper boat covers breathe, allowing moisture to escape while keeping rain and snow out.
Support the cover with poles or a frame to prevent water pooling. A pocket of water weighs a surprising amount and can tear even heavy-duty covers.
Lock your boat and leave a spare key with the marina or boatyard if they need access for maintenance or emergencies. Finally, double-check that your insurance covers the storage period and that you’ve met any specific requirements they have about winter lay-up.
Each item corresponds to the steps above, presented in a simple tick-box format. It covers:
Keep it somewhere safe, because you’ll want it again in autumn.
Here’s something many boat owners overlook: winter lay-up doesn’t just test your engine and plumbing. It puts stress on your entire drivetrain, particularly the components that connect your engine to your propeller shaft.
During storage, vibration stresses don’t simply disappear. Temperature changes cause metal to expand and contract. Hull movement (even slight movement in cradles or on trailers) transfers forces through poorly isolated drivetrains. Any existing misalignment between your engine and shaft becomes a stress point that gradually worsens.
Freezing and corrosion accelerate fatigue in metal components. Rubber parts in couplings and engine mounts can perish faster in very cold or very damp conditions.
By the time spring arrives, a coupling that was “fine” in October might have developed cracks or lost its flexibility.
Proper vibration isolation and alignment aren’t just about smooth running when you’re underway. They extend service life year-round, including during winter storage, by ensuring loads are distributed correctly and movement is controlled.
Even the most thorough winter boat maintenance depends on the quality of the marine components you’re protecting. Vibration, corrosion, and poor alignment shorten the life of mounts, couplings, and shafts, especially after extended lay-ups.
Misalignment and vibration are two of the leading causes of early component failure.
R&D Marine products address both at the source, giving you components that last longer, perform better, and reduce the frequency of maintenance interventions.
Whether you’re preparing your boat for winter or planning upgrades for next season, our team can help you specify the correct mount hardness, coupling type, and installation hardware for your vessel.
Call us on +44 (0)1462 892391 to discuss your custom product solutions to protect your investment all year round. Proper winter preparation starts with the right components, and we’ve been getting it right for over 50 years.